Vaultwarden
In today’s digital world, an efficient and secure IT infrastructure is crucial for success. A key component of a secure IT infrastructure is secure access data (complex passwords, different passwords, two-factor authentication, etc.). This is only feasible with the use of a password manager.
In our work, we have used several password managers:
- LastPass
- Keepass
- 1Password
- Vaultwarden
to name a few. Internally, we have been using Vaultwarden as our password manager for several years based on our experiences.
What is Vaultwarden?
Vaultwarden is a free, resource-efficient implementation of the Bitwarden server written in Rust. It was also known as Bitwarden_RS. Vaultwarden offers almost all the functions of the official Bitwarden service and is compatible with all Bitwarden tools, such as browser plugins or clients.
What features does Vaultwarden have?
- In addition to passwords, identities, cards, and other data can be managed.
- Secure sharing of stored data is supported.
- Import and export of data in various formats.
- Compatible with all Bitwarden apps and clients.
- Password generator.
- Permission concept.
- Emergency access.
- Two-factor authentication.
- Reports.
Advantages of Vaultwarden
Open-Source and Free
Vaultwarden is an open-source project, and the source code is freely accessible. This allows for customization and ensures that there are no hidden functions or backdoors. There is an active community that continuously develops the software and provides support.
Control over Data
Vaultwarden gives you complete control over your data; it is not a cloud service or dependent on one. It can be hosted almost anywhere you want.
There are excellent import and export options for the data.
Bitwarden Clients and Plugins
Vaultwarden is compatible with all official Bitwarden clients and plugins. This means you use the same plugins and applications that you use for Bitwarden, making the transition very easy.
Low System Requirements
Unlike other password managers, Vaultwarden has very low system requirements and dependencies. It can run on various platforms, from a small Raspberry Pi to a Kubernetes cluster.
Installation and Operation
The installation of Vaultwarden is simple and can be carried out on various platforms. Here is a simple guide for installation on a Linux server.
Prerequisites
For the next steps, we assume a Linux system with Docker currently installed.
Docker Configuration
We recommend configuring Docker to ensure IPv6 works if needed. Therefore, the file /etc/docker/daemon.json should look at least like this:
{
"ipv6": true,
"ip6tables": true,
"experimental": true,
"fixed-cidr-v6": "fd00::/64"
}
Docker Compose for Vaultwarden with Traefik for HTTPS
In this example, we run Vaultwarden with the SQLite backend and a reverse proxy named Traefik that can automatically manage Let’s Encrypt certificates.
docker-compose.yaml:
services:
  traefik:
    container_name: traefik
    image: traefik:latest
    ports:
      - 80:8080
      - 443:8443
    volumes:
      - /var/run/docker.sock:/var/run/docker.sock:ro
      - ./traefik-data:/letsencrypt
    networks:
      - default
    command:
      - --entrypoints.web.address=:8080
      - --entrypoints.websecure.address=:8443
      - --providers.docker
      - --log.level=ERROR
      - --certificatesresolvers.leresolver.acme.httpchallenge=true
      - --certificatesresolvers.leresolver.acme.email=info@example.org
      - --certificatesresolvers.leresolver.acme.storage=/letsencrypt/acme.json
      - --certificatesresolvers.leresolver.acme.httpchallenge.entrypoint=web
    labels:
      - "traefik.http.routers.http-catchall.rule=hostregexp(`.+`)"
      - "traefik.http.routers.http-catchall.entrypoints=web"
      - "traefik.http.routers.http-catchall.middlewares=redirect-to-https"
      - "traefik.http.middlewares.redirect-to-https.redirectscheme.scheme=https"
    restart: always
  vaultwarden:
    container_name: vaultwarden
    image: vaultwarden/server:latest
    restart: unless-stopped
    volumes:
      - ./vaultwarden-data/:/data/
    networks:
      - default
    environment:
      - DOMAIN=https://vaultwarden.example.org
      - LOGIN_RATELIMIT_MAX_BURST=10
      - LOGIN_RATELIMIT_SECONDS=60
      - ADMIN_RATELIMIT_MAX_BURST=10
      - ADMIN_RATELIMIT_SECONDS=60
      # Please add the token https://github.com/dani-garcia/vaultwarden/wiki/Enabling-admin-page#secure-the-admin_token
      - ADMIN_TOKEN=
      - SENDS_ALLOWED=true
      - EMERGENCY_ACCESS_ALLOWED=true
      - WEB_VAULT_ENABLED=true
      - SIGNUPS_ALLOWED=false
      - SIGNUPS_VERIFY=true
      - SIGNUPS_VERIFY_RESEND_TIME=3600
      - SIGNUPS_VERIFY_RESEND_LIMIT=5
      - SMTP_HOST=mail.example.org
      - SMTP_FROM=security@example.org
      - SMTP_FROM_NAME="Pasword Vault"
      - SMTP_SECURITY=starttls
      - SMTP_PORT=25
    labels:
      - "traefik.enable=true"
      - "traefik.http.routers.vaultwarden.rule=Host(`vaultwarden.example.org`)"
      - "traefik.http.routers.vaultwarden.entrypoints=websecure"
      - "traefik.http.routers.vaultwarden.tls=true"
      - "traefik.http.routers.vaultwarden.tls.certresolver=leresolver"
      - "traefik.http.routers.vaultwarden.service=vaultwarden"
      - "traefik.http.services.vaultwarden.loadbalancer.server.port=80"
networks:
  default:
    internal: false
    enable_ipv6: true
    ipam:
      driver: default
      config:
        - subnet: fd00:1::/64
          gateway: fd00:1::1
This is just a simple example that one would expand for productive operation.
Starting Vaultwarden
First, the file /etc/docker/daemon.json should be created or appropriately modified, as mentioned above.
Then restart Docker:
root@bar:~# systemctl restart docker
Next, we create a user and appropriate directories:
root@bar:~# adduser -g docker vaultwarden
root@bar:~# su - vaultwarden
vaultwarden@bar:~$ mkdir traefik-data
vaultwarden@bar:~$ mkdir vaultwarden-data
vaultwarden@bar:~$
Now, place the above docker-compose.yaml under /home/vaultwarden/docker-compose.yaml.
Next, the file should be adjusted according to local conditions.
Now you can download the containers and start the application:
vaultwarden@bar:~$ docker compose pull
vaultwarden@bar:~$ docker compose up -d
vaultwarden@bar:~$
After Traefik has fetched the certificate, the service should be available at the configured URL.
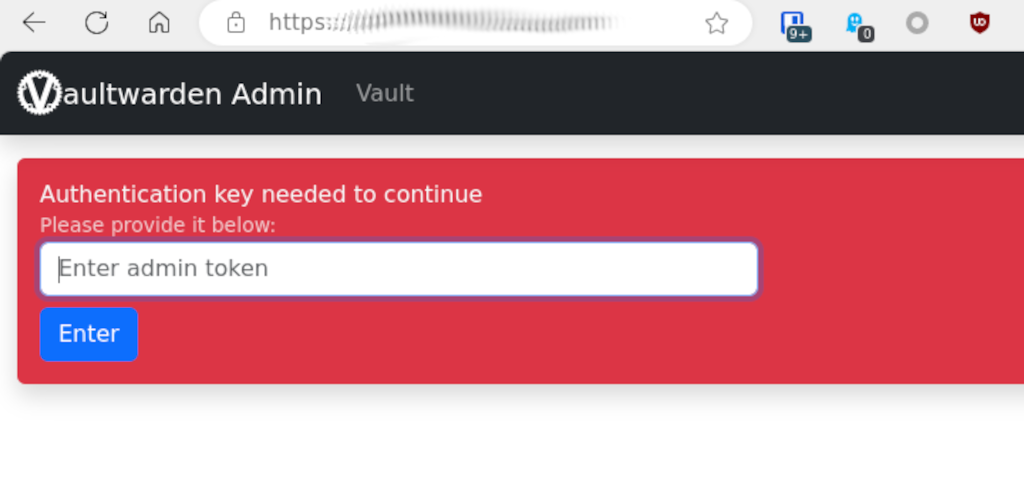
First, log in to the admin panel with the configured token:
After logging in, you will be in the admin panel menu:
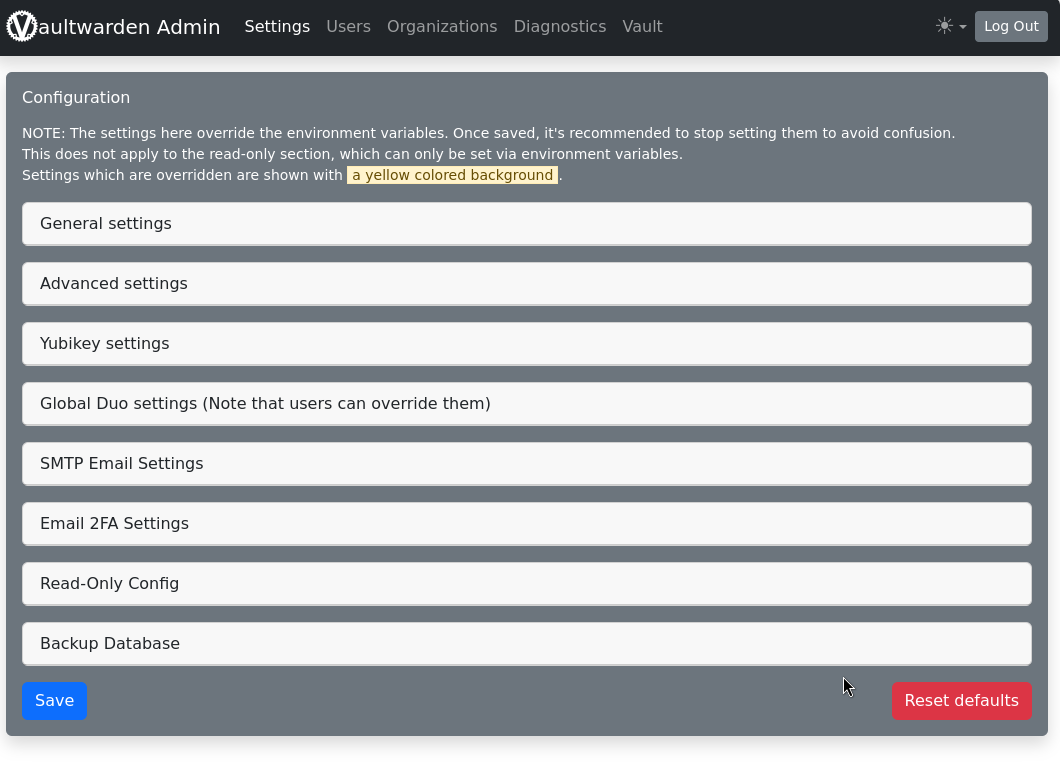
Here you can configure and perform all tasks such as backing up the database.
Thus, you now have a running instance.
Conclusion
With Vaultwarden, it is extremely easy to provide a secure, free, and self-hosted password manager to your users.
This significantly increases security when handling passwords and access data.
If you have any questions about implementing Vaultwarden in your IT environment or need support, please contact us.
